DIY Office Makeover
Posted: October 30, 2012 Filed under: Crafty, DIY, Random | Tags: DIY, home, makeover, office, room, shabby chic Leave a commentSo it appears I have neglected my blog since my birthday. I’ve thought about it a lot and I’ve told myself that I need to blog about a few particular things but when I have any time to sit, I do it because I have been a BUSY woman! One thing I had thought a lot about is my follow-up on my 30 before 30 post and I will still probably do that, just a few months after I turned 30. 🙂 Another post I’ve been meaning to do is a post with pictures of our new house. When my mother-in-law was here visiting I started making Kylee’s quilt for her bed so I had material everywhere. When she was getting ready to go she pulls out her camera and starts taking pictures of my disastrous house because she said relatives were asking to see the house. So I got her to stop with the promise of posting pictures, and I will come through on that promise… eventually 🙂 One of the hold ups for that post is actually that I had one wreck of a room that I was completely embarrassed to show and that was my office. So when we got back from Nebraska I decided to get on it!
It took me about 3 weeks mainly working on the weekends to get everything done, and considering I made almost everything that went into the room, I think 3 weeks is pretty quick! Before we get started, let’s show everyone the dreaded BEFORE pictures.
In Farmington we had 2 desks in our office, one for Kyle’s computer and one for mine and neither of them were nice and probably wouldn’t have made it to Texas in tact so we donated them. When we got here I had to work, so I used our white foldout table to temporarily work on. As you can see I also had a couple of boxes that hadn’t been unpacked because I had no where in the office to put the stuff. The room also has to have a play area for Kylee because most of the time she wants to be in the same room as me, so in order to get any work done there HAS to be stuff to keep her entertained.
Here is the after picture… As you may or may not be able to tell, I went with a shabby chic theme and I LOVE how it turned out!!!
The first thing I did was start building the desk. Yes, I built that! I’ll do another post with specifics on how I did it but I’ll give you a quick run down. First I built the top using pallet slats, put a border around it, and filled it with epoxy. The epoxy took one whole weekend itself. The next thing was to build the cabinets which I have to give a lot of credit to my dad for that one! The space and quality is awesome and it has everything to do with his designing them (and helping me build them of course). The last step was painting which was several steps. Since I did shabby chic, I needed the desk to look weathered (somewhat). So I did a coat of brown, did faux scratches with a cream paint, drew on the antique label on the side, and used Annie Sloan’s dark soft wax to give it the aged look (yes, it’s supposed to look dirty).
Here is a closer look at the desk…
I have 4 drawers in the cabinet on the left and the cabinet on the right has 2 slide out shelves inside, one close to the top to hold paper and one on the bottom to hold my printer.
This is Kylee’s area. I painted the back of the cabinet with chalkboard paint so Kylee could color on it, I bought Kylee’s desk at the antique show I went to last month along with the window frame that I painted to match my color scheme. Then I built a toy box out of left over pallet slats to match the room and get rid of the ugly, cheap green one from Target. I LOVE that it looks like an old crate. If you are going to make a toy box out of pallets MAKE SURE to sand it VERY well! I lost count of how many pieces of sand paper I went through to get it sanded down enough. To get the distressed look in the front and back, I just used a dry brush painting technique so the paint didn’t get down in the grooves.
The shelf is just a shelf kit from Lowes that I painted to look distressed. I do plan on slowly adding other shabby chic items up there, slowly but surely. The old sewing machine and lantern I got at the antique show in Roundtop as well.
This is one of the last things I created for the room. I bought the frame as it is in Roundtop, put fabric around a piece of cardboard to fill the frame and created the flower with pages from an old book cut into petals and hot glued onto a round piece of cardboard.
So that’s it, my new office! The grand total for the whole makeover was $825. The desk ended up being more than I expected and a majority of the sum at $605. Half of that was the epoxy; since I had to order it I also had to pay $50 for shipping. Paint and wax cost me $110 and all the accessories cost me another $110. I still plan on painting the book shelf from the before picture and making a couple of little boxes from pallets to use as storage on the book shelf.
30 Before 30 ~ DIY Fan Makeover
Posted: July 26, 2012 Filed under: 30 Before 30, Crafty 1 CommentThe house that we purchased here in Texas was a foreclosure. Now don’t get the wrong picture, it’s only 5 years old and it is in such great condition that when we looked at it, we first thought it was a brand new house. The people before didn’t trash it (if they did the bank fixed it all) but they did take anything of value. They took the stove, the motors for the garage door openers, the blinds, and even all the ceiling fans. You know the bank spent as little as possible trying to get it in shape so they put in the $10 lighting fixtures in every room and being this is Houston, we desperately needed ceiling fans. Kylee’s room was the last priority since, at the time, she was not staying in there.
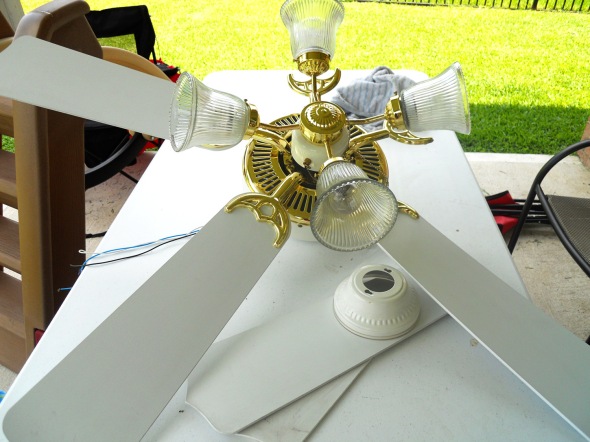
My aunt took down an old ceiling fan from their house and asked if we wanted it. We had spent a lot on the house already, so I’m sure as heck going to take something for free! She took it out for a reason; it’s an old ugly plain white fan with GOLD accents and I HATE gold. So I decided it’s going in Kylee’s room, why not make a project out of it!!!! Heck, it was free, I have nothing to lose.
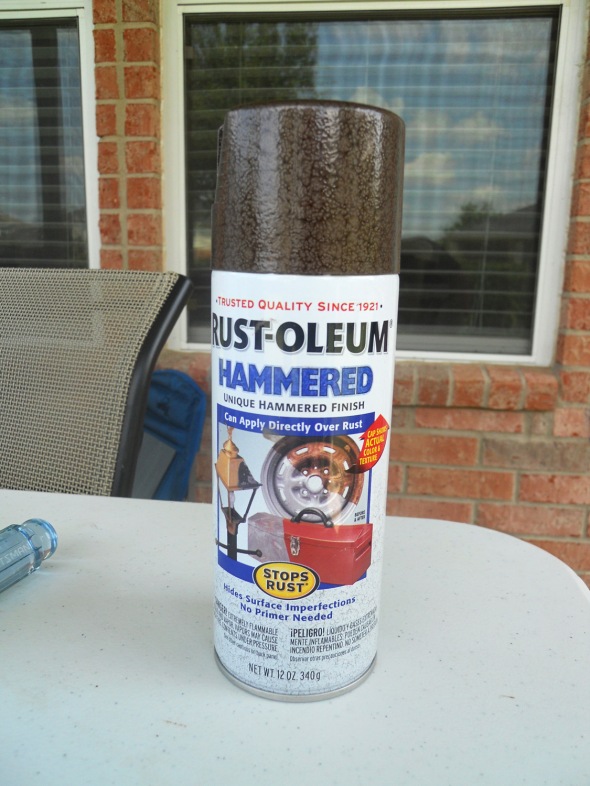
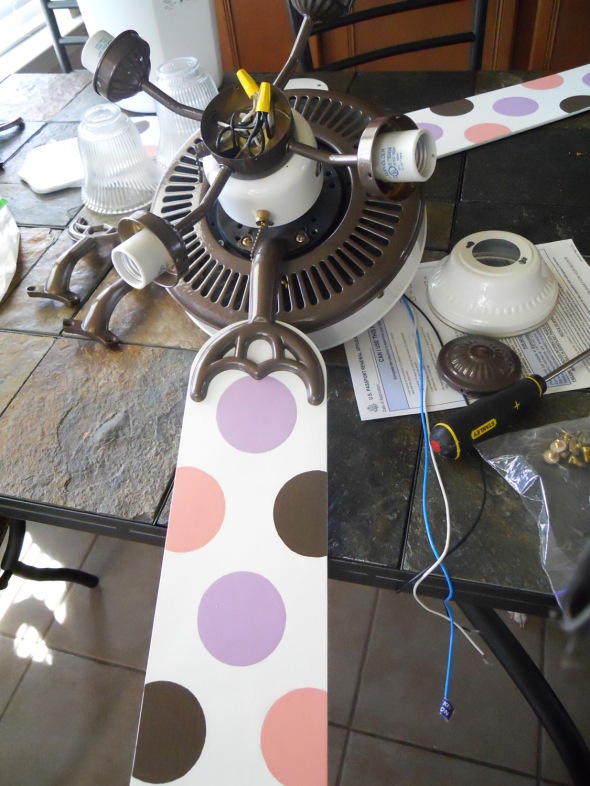
This was the fan when we received it, boring and outdated. So my first task was to disassemble it and get rid of all the gold. I took everything that was gold and applied 2 coats of Rustoleum hammered bronze. I loved the hammered look and it really did turn out as good as it looks on the cap of the can.
The next thing I did was paint colored polka dots onto the fan blades that coordinate with the colors that I did in Kylee’s room. I’m a perfectionist, so I used the spray paint can as a stencil for the circles and I carefully measured out where they went to make sure every fan was the same.
After that all I had to do was reassemble the fan. Now the thing that I am most proud of is that Kyle didn’t help me with any of it!! I took it all apart and put it all back together all by myself; the only thing he did was hang the fan in the room.
And here is the finished product hanging in Kylee’s new room, which she does spend a lot of time in now.
30 Before 30 Progress ~ Snowman Hair Clips
Posted: December 24, 2011 Filed under: 30 Before 30, Crafty Leave a commentI now have 13 of my 20 DIY projects completed. I got quite a few with Kylee’s party since I made SO much of her decorations.
It’s been a little hard to get into my Christmas festiveness as I usually would with the recent relocation notification but one thing I did do was make cute little snowman hair clips for Kylee and her cousin. Lexie has significantly more hair than Kylee, so she can wear them right, but I had to put Kylee’s on a headband for them to stay in her hair. Maybe next year that won’t be needed…
This project was super easy! I made myself little stencils to trace to make sure everything was the same size, cut the pieces out of craft felt, glued the pieces together with liquid stitch, drew a smile on with a sharpie (my intent was to sew a smile on but I never got around to it) and hot glued a hair clip on the back!

Crafty Friday ~ Owl Costume
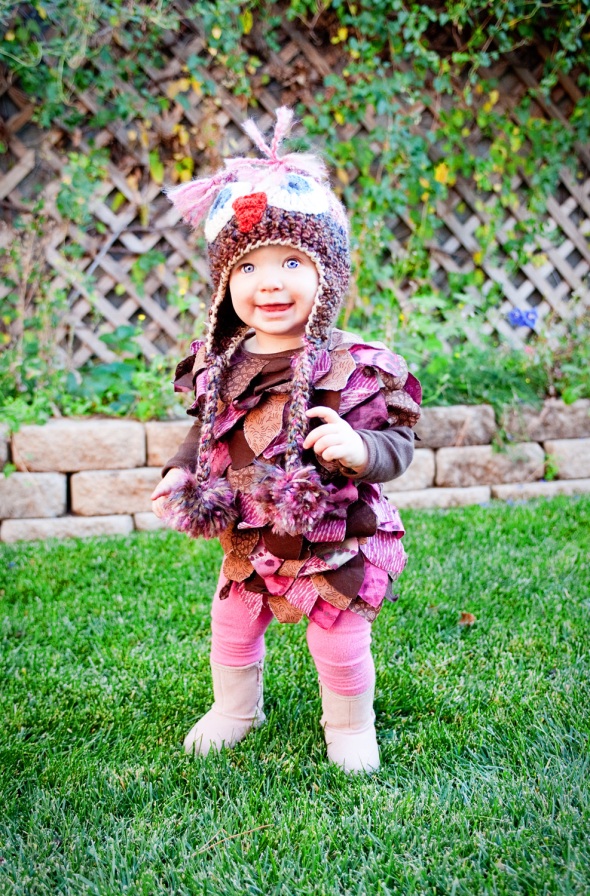
Posted: November 5, 2011 Filed under: Crafty, Kylee 1 CommentYep, that’s my little girl all dressed up for Halloween! Recently I’ve become addicted to buying hats for Kylee and this owl hat is one of the ones that she just HAD to have! I got this hat and a custom designed zebra hat from JoJo’s Bootique and will probably order more from her because I LOVE them and get so many compliments on Kylee’s hats. So I wanted the zebra hat for Kylee’s birthday pictures and fell in love with this owl hat while working with Jodi on the zebra hat. So to justify buying it, I made it her Halloween costume!
Kylee had a brown long-sleeved onesie that I got way cheap at the end of last winter. I cut out feather shapes in 5 different coordinating colors of fabric to match the hat. Instead of sewing all of the feathers on, I used fabric glue to save time. Add some pink leggings and VUALA! It was an adorable and warm costume for Kylee to wear for her first Halloween!
Here is a picture of us out trick-or-treating!

30 Before 30 ~ Craftiness
Posted: October 1, 2011 Filed under: 30 Before 30, Crafty Leave a commentOne thing on my 30 before 30 list is to do 20 DIY projects. I’m actually doing really well on that goal; steadily on my way there. I’ve done several projects. I have made the shirt that Kylee is going to wear on her birthday (pictures of that will be on her birthday post), I’ve made Kylee some cute headbands, I made a pin board to hold all of the cards we get from our family and friends, I made a snowman hat for Kylee, and I also made a bow holder to hold Kylee’s growing collection of bows and headbands.
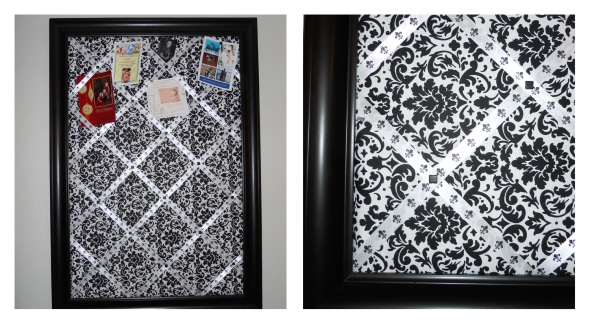
The first thing I made was this pin board. I see a lot of boards like this, but never in a pattern I like, big as I want, or as nice as I want. So I decided to make one! I bought a roll of corkboard and glued it onto a poster board. Then I put two layers of batting on the board and covered it with the material that I liked. After that I glued ribbon in a crisscross pattern. I bought flat push pins and a set of black square brads from the scrapbooking section at Hobby Lobby. I cut the prongs off the brads and glued the squares to the push pin, then glued them where the ribbon intersected. I also made extras to pin stuff up. I had measure the board to fit inside a frame that I had bought in the custom frame isle when they were half off at Hobby Lobby.
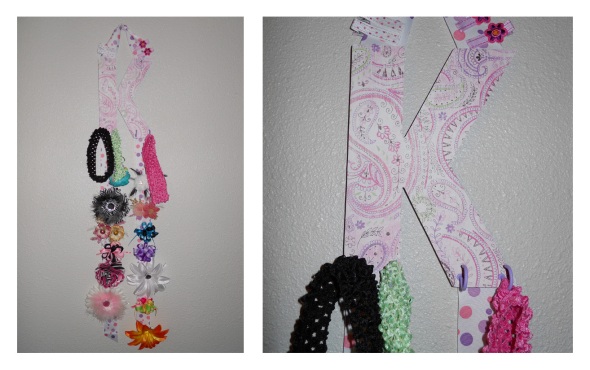 The next project I did was Kylee’s bow holder. I simply bought a wooden K and a piece of scrapbook paper that I liked cut to fit the K and glued on. I bought some hooks that screw on and painted them purple to match the paper. Then I simply glued on ribbon to the back of the K to hang it and to clip the bows onto!
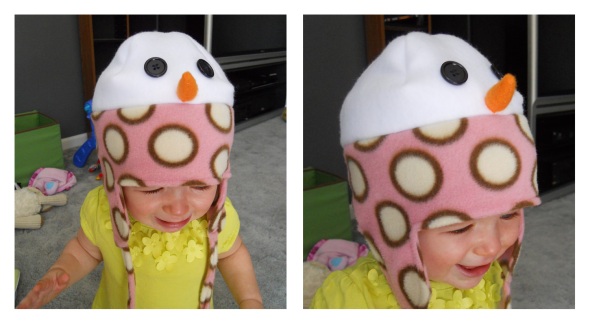
This is my project that I just finished today. This is the first hat that I’ve made and I love how it turned out but there are some changes that I will make if I ever make another. I saw this snowman hat and a penguin hat that I thought I would try to make myself. I couldn’t find a tutorial on how to make it so I had to wing it. I’m actually very proud of myself with how well it turned out with no instruction. This one was way too much to try to explain, but maybe one day I will post a tutorial. Kylee doesn’t look happy about the hat but it’s because she’s not feeling well, I promise!
I’m hoping to post more of these with instructions on how I did them so I can participate in Crafty Friday that the Crafty Nest hosts. Hope everyone has a great weekend! We are in Albuquerque for the Balloon Fiesta so stay tuned for pictures of all the hot air balloons!
Kylee’s Modeling Debut
Posted: June 20, 2011 Filed under: Crafty, Kylee Leave a commentNo, it’s really not THAT glamorous…
I got the craft bug again. Kylee’s still getting mistaken for a boy a lot since she has very little hair and she doesn’t always wear pink (hardly ever actually). So I took some inspiration from some CUTE headbands that our awesome friend Rebehah Wagner made Kylee and decided I need to start putting more bows in her hair. The problem I’m running into is that I don’t like the HUGE flowers that are as big as a child’s head and all the little ones that we have are getting too small for her head. I decided I wanted to make some that will clip onto the crochet headbands that she already has.
So I went to hobby lobby, got some supplies, put it all together, and LOVED what I had ended up with!! I got some good feedback on them and someone suggested that I could make them and sell them on Etsy. So I took some pictures and posted a few on Etsy. Time will only tell if everyone else thought they were as cute as I did. Anyways, I needed pictures of them for the postings, so Kylee was my little model. And I must admit, I think she is a PERFECT model!! 🙂
Here is how they turned out!
Nesting or Craftiness
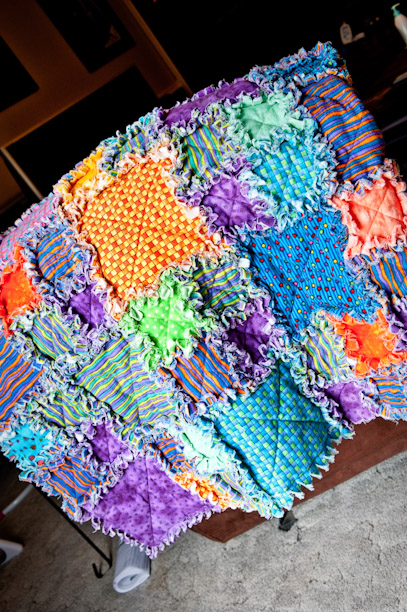
Posted: April 11, 2011 Filed under: Crafty 1 CommentAbout 6 years ago I started to make a quilt. 5 years later, all the pieces are still not sewn together, therefore I have no quilt still. About a month before Kylee was born I decided to finish that quilt before she came and I didn’t have time to anymore. So I did finish that quilt, but then it gave me the bug to get crafty some more. So I made some stinkin’ cute name blocks that hang above her bed. I was so proud of myself but everyone said I was nesting.
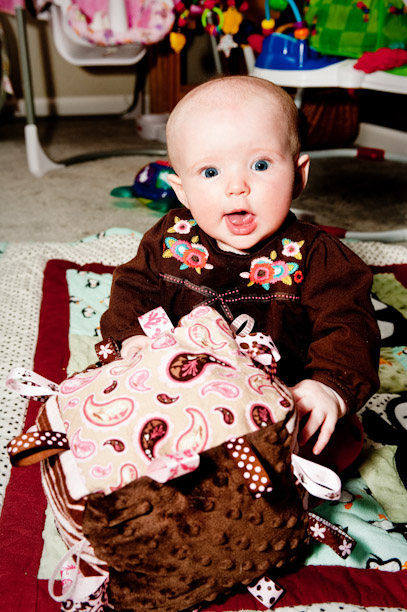
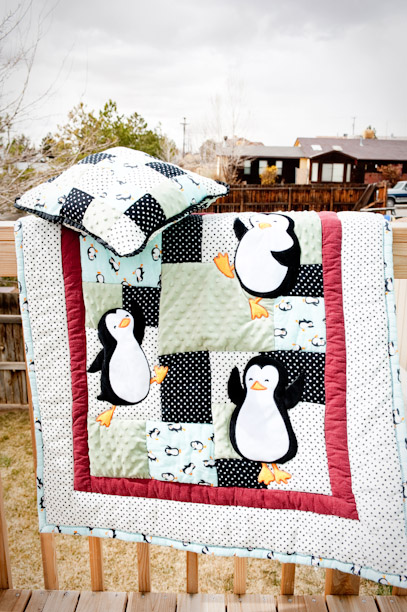
Well, I must still be in nesting mode because I have kept at it since Kylee was born. I made her a blanket and pillow so she could have them to play with on the floor. I loved it so much I’ve decided I’m making blankets for all my friends that have babies from here on out. Then I made Kylee and Lexie (my niece) tag blocks that Kylee loves to play with, so maybe I’ll include one of those in the baby gifts as well. Then I saw a WAY cute idea that I want to try next, I just wish I had seen it earlier so Kylee could have had it for the winter. They are fleece hats!! One will look like a penguin and the other a snowman!! I’m excited to see if I can make it look right. Just need to find the time.
But I’m doing well on my goal to make baby gifts!! I’ve made baby Calloway his blanket and matching pillow and I actually love it more than I love Kylee’s! While looking for patterns for hats, I saw that Martha Stewart sends e-mails for a “Craft a Day” and I’m waiting to see something that I really want to do. My mom went through this stage at one point too which makes me curious if it’s a stage or if it will last. I guess we will see!!
Kylee playing with her tag block
The quilt I finally finished
Kylee’s blanket and matching pillow


